
Are you ready to give your home a stunning new look? Installing laminate flooring is an excellent way to upgrade your space and add value to your home. With the right tools, a bit of preparation, and our step-by-step guide, you can achieve a beautiful, professional-looking installation without breaking the bank.
Key Takeaways
- Installing laminate flooring is an affordable way to upgrade your home.
- The right tools and preparation are essential for a successful installation.
- Following a step-by-step process will ensure a professional-looking result.
- Taking care of your laminate flooring will keep it looking great for years to come.
- Our guide makes it easy to achieve a flawless, DIY-friendly installation.

Understanding Laminate Flooring
Before starting your laminate flooring installation project, it’s essential to have a clear understanding of what laminate flooring is. Laminate flooring is a synthetic flooring material that simulates natural wood or stone flooring. It consists of a high-density fiberboard core, a photographic layer, and a protective wear layer.
There are different types of laminate flooring, each with its unique characteristics. The most common types include:
| Type | Description |
|---|---|
| Glueless-click laminate | Easy to install with interlocking tongue-and-groove joints. No adhesive is required. |
| Glued laminate | Requires adhesive for installation. Stronger and more stable than glueless-click laminate. |
| Pre-glued laminate | The planks come with adhesive already applied to the tongue-and-groove edges, making installation quicker and easier. |
Now that you know what laminate flooring is and the different types available, let’s explore the benefits of choosing laminate flooring for your home.

Laminate Flooring Benefits
“Laminate flooring is a practical and affordable flooring solution that has come a long way in both aesthetics and durability.”
- Durable: Laminate flooring is highly resistant to scratches, stains, and wear and tear.
- Easy to clean: Laminate flooring is a very low-maintenance flooring option that can be easily cleaned with a simple dust mop or vacuum. Stains can be quickly cleaned up with a damp cloth or sponge.
- Affordable: Laminate flooring is an excellent value for its price and is generally less expensive than natural flooring materials like hardwood or stone.
- Realistic wood-like appearance: With advancements in technology, laminate flooring can now closely mimic the look and texture of natural wood flooring.
- Easy to install: Laminate flooring is a DIY-friendly flooring option that can be installed quickly and easily.
Choosing laminate flooring offers many benefits for your home. From durability to affordability, this synthetic flooring material has come a long way in both aesthetics and functionality, making it an attractive option for homeowners.
Preparing for Installation
Before starting the actual installation process, it is crucial to prepare your space properly. This includes having the necessary tools and equipment, as well as prepping your subfloor. Here are some essential steps to follow when preparing for your laminate flooring installation:
Gather the Right Tools
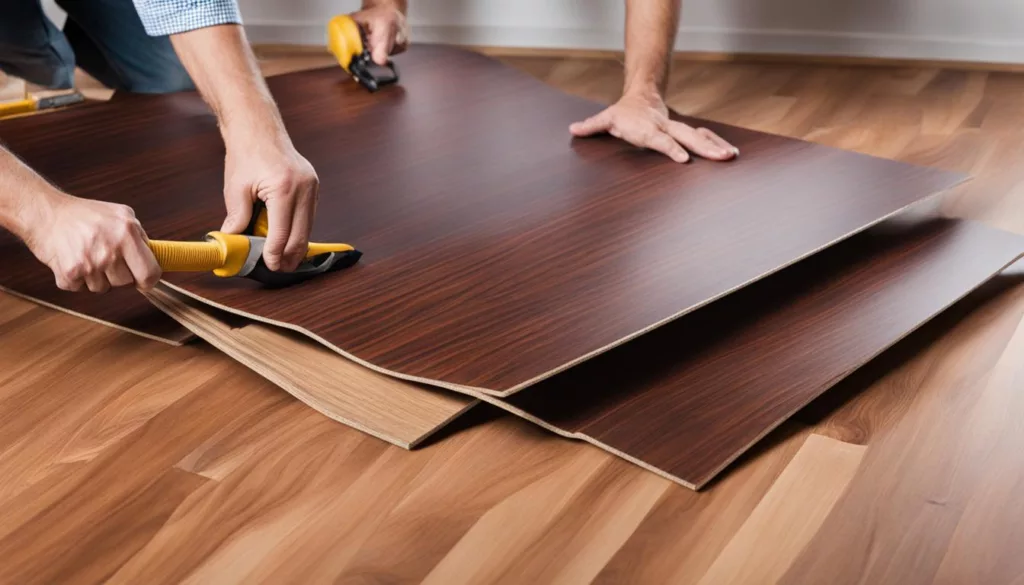
To make your installation process smooth, you will need some specific laminate flooring tools. These include:
| Tools | Details |
|---|---|
| Measuring Tape | For taking accurate measurements of your space to ensure you have the right amount of laminate flooring. |
| Saw | For cutting your laminate flooring to fit your space. |
| Pry Bar | For removing any existing baseboards or moldings. |
| Spacers | To ensure proper spacing between the laminate flooring and the wall. |
| Knee Pads | To help protect your knees during the installation process. |
Prepare Your Subfloor
Before installing your laminate flooring, you need to ensure that your subfloor is properly prepared. Here are the essential subfloor preparation steps:
- Remove any existing flooring and debris from the subfloor.
- Inspect the subfloor for any damage or unevenness. Repair any issues found.
- Clean and dry the subfloor thoroughly before installing the laminate flooring.
- Use a laminate flooring underlayment to create a smooth surface for installation. This will also help reduce noise and provide insulation.
By taking the time to prepare your space properly, you can ensure a smooth and successful laminate flooring installation process.

Measuring and Ordering Laminate Flooring
Accurate measurements are crucial to avoid running out of laminate flooring or ending up with too much. To determine the square footage necessary for your project, measure the length and width of your room and multiply them together. Don’t forget to add around 10% extra to account for cutting and waste.
If you’re unsure how much flooring you need, use a
laminate flooring calculator
to help you determine the exact amount required. Many online retailers offer calculators that make this process easy and stress-free.
Once you have your measurements, it’s time to order your laminate flooring. Double-check your calculations before placing an order to ensure you have enough flooring to complete the job. It’s also important to order all of the materials you’ll need in one go to avoid discrepancies in color or texture.

When ordering laminate flooring, consider the quality of the product, durability, and overall cost. Research different brands and read reviews from previous customers to ensure you’re making an informed decision.
By taking the time to measure your space and order the right amount of laminate flooring, you can ensure a smooth and hassle-free installation process.
Acclimating Laminate Flooring
Before installing laminate flooring, it’s crucial to acclimate it properly to the environment of the room. This ensures that the flooring will not be affected by temperature or humidity changes that can occur after installation, which can lead to warping or expansion.
The proper acclimation process involves allowing the flooring to sit in the room where it will be installed for at least 48 hours, preferably 72 hours, before installation. During this time, the temperature and humidity of the room should be maintained at the level it will be after installation.
To ensure the proper environment for acclimating your laminate flooring, use a digital thermometer and hygrometer. These tools will help you measure the temperature and humidity levels of the room and ensure they match the manufacturer’s specifications for proper acclimation.
It’s important to note that the acclimation process can vary based on the type of laminate flooring and the climate in your area. Check with the manufacturer for specific acclimation guidelines based on your installation environment.

Proper acclimation is a crucial step in ensuring a successful laminate flooring installation. Take the time to acclimate your flooring properly and you’ll enjoy beautiful, durable results for years to come.
Step-by-Step Installation Process
Now that you’ve prepared your space for the laminate flooring installation process, it’s time to get started! Follow these easy steps to ensure a successful installation:
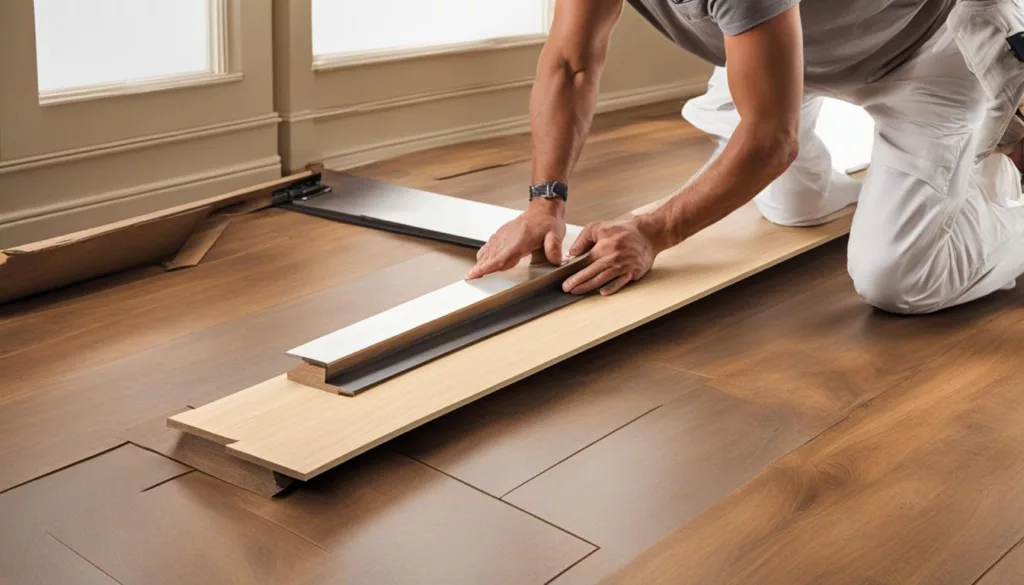
- Begin by laying out the underlayment, ensuring each row is tight together and has no overlaps.
- Starting in the corner of the room, lay the first plank with the tongue side facing the wall. Leave a 1/4-inch gap between the end of the plank and the wall.
- Continue laying planks row-by-row, using spacers to create an expansion gap around the perimeter of the room.
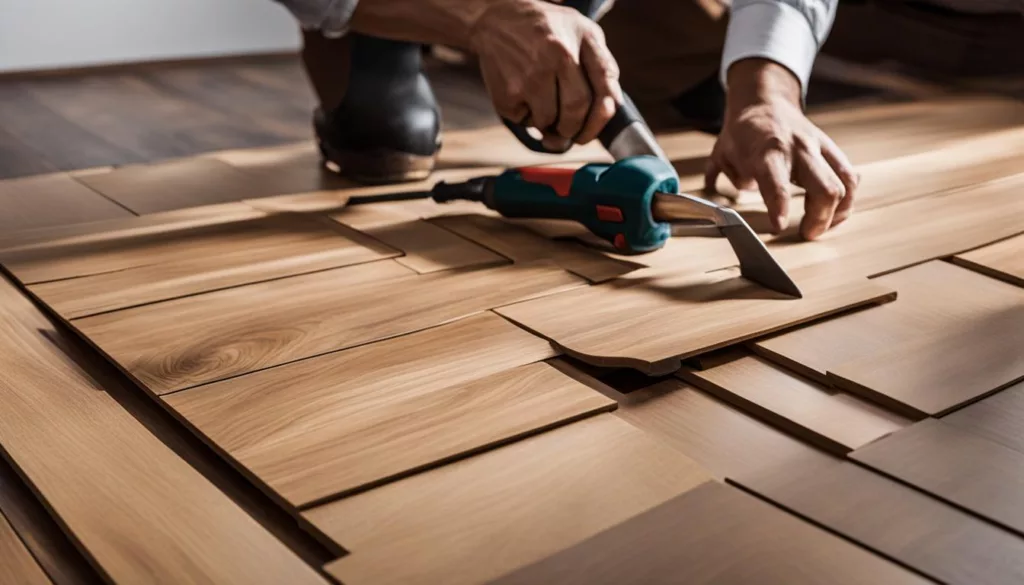
- When installing the last row, measure and cut each plank to fit snuggly into place. Tip: Use a pull bar to help snap the last row into place.
- Install trim pieces, such as baseboards and transitions, to complete the look. If you need help installing transitions, refer to the table below.

Note: Depending on the type of laminate flooring you are installing, the installation process may vary slightly. Always refer to the manufacturer’s instructions for specific guidance.
How to Install Transitions for Laminate Flooring
| Type of Transition | Description |
|---|---|
| T-Molding | For connecting two different types of flooring that are at the same level |
| Reducer | For connecting two different types of flooring that are at different levels |
| End Molding | For finishing laminate flooring at doorways or thresholds |
With these simple steps and tips, installing laminate flooring has never been easier. In the next section, we’ll explore some additional tips and tricks for achieving a professional finish for your new floors.
Tips and Tricks for a Professional Finish
Now that your laminate flooring is installed, it’s time to add those finishing touches that will make all the difference. Whether you’re a DIY enthusiast or a skilled professional, these expert tips will help you achieve a flawless, professional-looking result.
Achieving Proper Spacing
One of the keys to a professional-looking laminate floor is ensuring proper spacing between the planks. Use spacers to create a gap of at least 1/8 inch between the flooring and the walls. This gap allows for expansion and contraction as temperature and humidity levels change.
Addressing Common Installation Challenges
“When it comes to laminate flooring installation, the most common mistake is failing to properly acclimate the flooring before installation. This can result in buckling, gaps, and other issues down the line.”
– Rob Brunt, flooring installation expert
Other common challenges include dealing with uneven subfloors and making accurate cuts around corners and obstacles. Take your time, measure twice, and don’t be afraid to seek professional help if needed.
Maintaining Your Laminate Flooring
Regular maintenance is key to preserving the beauty and durability of your laminate flooring. Sweep or vacuum regularly to remove debris, and clean up spills promptly with a damp cloth. Avoid using harsh chemicals or abrasive cleaning tools that can damage the floor’s surface.
Protecting Your Investment
To prevent scratches and scuffs, use felt or rubber pads on furniture legs, and avoid wearing high heels or cleats on the flooring. If you need to move heavy furniture, use a furniture dolly or enlist the help of a friend to lift and carry the items.
By following these simple tips for achieving a professional finish and maintaining your laminate flooring, you’ll enjoy a beautiful, long-lasting floor for years to come.
Adding Finishing Touches
As you near the end of your laminate flooring installation project, it’s time to add the finishing touches that can enhance both the look and durability of your floors. Two key elements to consider are transitions and underlayment.
Installing Laminate Flooring Transitions
Laminate flooring transitions are strips of material that cover the space between two different flooring types. Not only do they provide a seamless transition, but they also protect the edges of your floors from damage. To install transitions:
- Measure the length of the gap between the floors and choose a transition strip that fits.
- Cut the strip to size with a saw or heavy-duty scissors.
- Align the strip over the gap and attach it to the subfloor with adhesive or screws, depending on the type of strip.
- Finish by filling any gaps or nail holes with wood filler and sanding it smooth.
Pro tip: It’s important to choose the right type of transition strip based on the height difference between the floors and the direction in which the flooring was laid. Consult with a flooring professional if you’re unsure which type to choose.
Installing Laminate Flooring Underlayment
Laminate flooring underlayment is a layer of material that’s placed between the subfloor and the laminate planks. It can improve sound absorption, protect against moisture, and provide a smoother surface for installation. To install underlayment:
- Clean and dry the subfloor before laying the underlayment.
- Roll out the underlayment in the same direction as the flooring planks, leaving a 1/4-inch gap around the perimeter of the room.
- Cut the underlayment to size with a utility knife.
- Overlap the seams by several inches and tape them together with underlayment tape.
- Finish by installing your laminate flooring directly over the underlayment.
Pro tip: Not all laminate flooring requires underlayment, so consult the manufacturer’s instructions before making a purchase. Additionally, some laminate flooring is sold with pre-attached underlayment, in which case you can skip this step.
After installing transitions and underlayment, you’re ready to enjoy your newly installed laminate flooring. Don’t forget to add some final touches, such as area rugs and furniture, to turn your space into a cozy, inviting oasis.

Maintaining Your Laminate Flooring
Once your beautiful new laminate flooring is installed, it’s important to know how to properly maintain and care for it. With the right care, you can ensure your laminate flooring lasts for years to come. Here are some tips for cleaning, protecting, and preserving your laminate flooring:
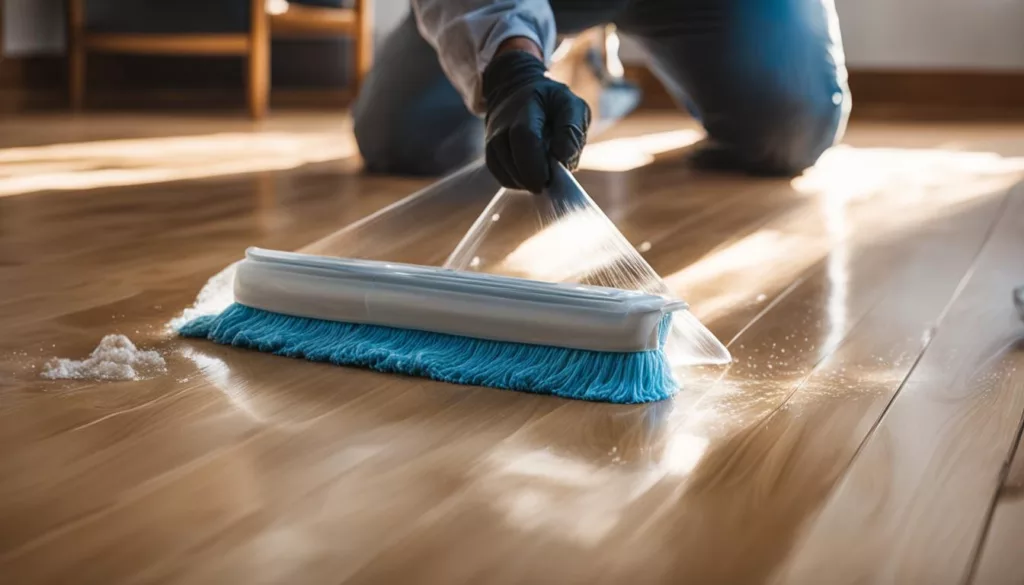
Cleaning Laminate Flooring
Keeping your laminate flooring clean is key to maintaining its beauty and durability. Regularly sweep or vacuum your floors to remove dirt and debris. For deeper cleaning, use a damp mop with a laminate flooring cleaner specifically designed for this type of flooring. Avoid using harsh chemicals or excessive water, which can damage your flooring.
Tip: wipe up spills as soon as possible to avoid damage to your flooring.
Protecting Laminate Flooring
Preventing damage to your laminate flooring is crucial for ensuring its longevity. Use furniture protectors on the legs of tables and chairs to avoid scratches and dents. Place doormats at entryways to prevent dirt and debris from being tracked onto your flooring. Additionally, avoid wearing high heels or walking on your flooring with cleats or shoes with spikes, as these can cause damage.
Preserving Laminate Flooring
To keep your laminate flooring looking like new, it’s important to take steps to preserve its appearance. Avoid exposing your flooring to direct sunlight, which can cause fading. Use blinds or curtains to block out direct sunlight. If you need to move heavy furniture, use a furniture dolly to avoid dragging it across your flooring, which can cause damage.
By following these tips for laminate flooring maintenance, cleaning, protecting, and preserving, you can enjoy the many benefits of your new flooring for years to come.
Complete Laminate Flooring Installation Guide
Looking for a cost-effective DIY flooring update? Installing laminate flooring is a perfect solution. Our comprehensive laminate flooring installation guide will provide you with all the necessary steps and tips for a successful installation. With this simple guide, you can transform your space into a modern and stylish living area.
DIY Laminate Flooring
Installing laminate flooring is a great way to take the reins and create your dream flooring. With our detailed instructions, you can handle the installation process like a pro.
Laminate Flooring Installation Method
Our guide gives you the complete laminate flooring installation method, from preparation to adding the finishing touches. You don’t need any special tools or experience to install laminate flooring, as our guide breaks down the process into easy-to-follow steps.
By following our guide, you’ll learn:
- How to understand different types of laminate flooring and choose the best one for your space
- How to properly measure your space and order the right amount of flooring
- How to acclimate your laminate flooring to your home’s environment
- The step-by-step process of installing laminate flooring, including tips for avoiding common installation issues
- How to add finishing touches that will make your laminate flooring look polished and professional
- Maintenance tips to help you protect and take care of your new laminate flooring for years to come
With our laminate flooring installation guide, you can achieve a professional-looking update to your home’s interior. Why wait? Start your laminate flooring installation today!
Thanks For the Great Attention!
Also, Read,
How to Choose A Laminate Flooring
Pros & Cons of Laminate Flooring
Best Waterproof Laminate Flooring Options
FAQ
How do I choose the right type of laminate flooring for my home?
Choosing the right type of laminate flooring depends on various factors such as your budget, the room’s level of foot traffic, and your personal style preferences. Consider the thickness, AC rating, design options, and installation method when selecting laminate flooring.
Can I install laminate flooring over any type of subfloor?
Laminate flooring can be installed over various types of subfloors, including plywood, concrete, and existing vinyl or tile flooring. However, it’s important to ensure that the subfloor is clean, level, and free from any moisture or structural issues.
Do I need specialized tools for laminate flooring installation?
While professional-grade tools are not necessary, there are a few tools that can make the installation process easier. These may include a laminate cutter, tapping block, pull bar, spacers, and a circular saw for making precise cuts. However, many basic tools like a tape measure and a utility knife are commonly used.
How do I measure my space for laminate flooring?
To measure your space for laminate flooring, start by calculating the square footage of each room. Measure the length and width of the room and multiply these numbers to get the total area. Don’t forget to add a 10% overage to account for any wastage or mistakes during installation.
How long does laminate flooring need to acclimate before installation?
Laminate flooring typically needs to acclimate to the environment of your home for at least 48 hours before installation. This allows the flooring to adjust to the temperature and humidity levels of your space, minimizing the risk of warping or buckling after installation.
What is the step-by-step process for installing laminate flooring?
The step-by-step process for installing laminate flooring involves preparing the subfloor, laying the underlayment, installing the first row, fitting the subsequent rows, making necessary cuts, and securing the flooring. Our comprehensive installation guide provides detailed instructions for each step.
What are some tips for achieving a professional finish during laminate flooring installation?
To achieve a professional finish, ensure proper spacing between planks, use a tapping block and pull bar to secure the flooring tightly, and carefully trim door jambs for a seamless transition. Additionally, follow the manufacturer’s guidelines for specific installation tips and recommendations.
How do I add finishing touches to my laminate flooring installation?
Finishing touches such as installing transitions and underlayment are essential for a complete and polished look. Transitions provide a smooth transition between different flooring types, while underlayment enhances the sound reduction and moisture resistance of your laminate flooring.
How do I clean and maintain my laminate flooring?
Cleaning and maintaining your laminate flooring is relatively easy. Regularly sweep or vacuum the floor to remove dirt and debris, and use a damp mop with a mild cleaning solution specifically designed for laminate flooring. Avoid excessive water, harsh chemicals, or abrasive tools that could damage the surface.

Thank you for the auspicious writeup It in fact was a amusement account it Look advanced to more added agreeable from you By the way how could we communicate
You made a great point: to get a professional finish, make sure the boards are properly spaced apart, fasten the flooring firmly with a tapping block and drawbar, and carefully trim the door jambs for a smooth transition. For more installation advice and recommendations, refer to the manufacturer’s instructions. My house seems to be losing part of its tile flooring, therefore I would want to replace it. I appreciate the advice you provided on organizing a smooth floor installation, and I’m hoping to locate a reputable service provider for my home soon.