
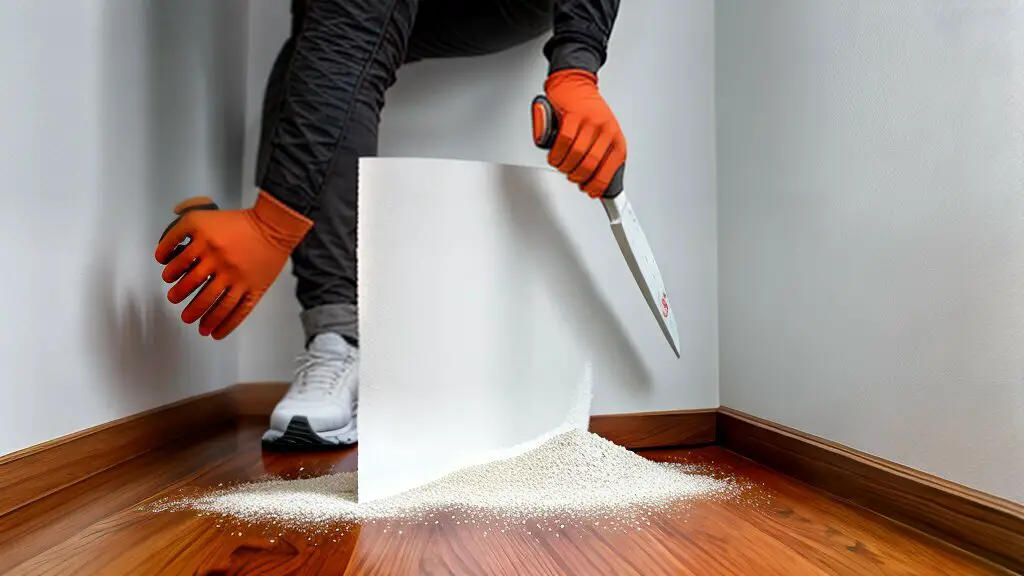
At our company, we understand the importance of achieving a flawless finish when working with drywall. That’s why we believe mastering drywall mud is essential for any successful project. Drywall mud is a versatile material used to cover joints, seams, and imperfections in drywall, ultimately creating a seamless surface. With the right techniques and knowledge, you can achieve professional-looking results that will impress your clients.
Before we dive into tips, tricks, and techniques, let’s start with the basics.
Key Takeaways:
- Drywall mud is a versatile material used to cover joints, seams, and imperfections in drywall.
- Mastering drywall mud is essential for achieving a flawless finish.
- With the right techniques and knowledge, you can achieve professional-looking results.
What is Drywall Mud? Understanding the Basics
Before exploring the techniques and tips for mastering drywall mud, it’s important to understand the basics of what drywall mud is and its purpose in the mudding process.
Drywall mud, also known as joint compound, is a paste-like substance used to fill and cover gaps and seams in drywall installations. Its purpose is to create a smooth and seamless surface that gives the illusion of a single continuous wall.
| Type of Drywall Mud | Characteristics |
|---|---|
| All-Purpose | Can be used for all stages of the mudding process and is suitable for most applications. |
| Setting | Dries quickly and is ideal for larger projects and when fast progress is required. |
| Topping | Has a smooth finish and is used for the final coat of the mudding process to achieve a flawless surface. |
There are different types of drywall mud available in the market, each with specific characteristics that cater to different requirements. The three main types of drywall mud are:
All-purpose drywall mud is the most common type and can be used for all stages of the mudding process, including taping, filling, and finishing. It is also suitable for most applications, making it a versatile choice for most DIY and professional projects.
Setting drywall mud is designed to dry quickly and is ideal for larger projects or scenarios that require fast progress. It is available in different setting times, ranging from 20 minutes to 90 minutes, providing flexibility to cater to different requirements.
Topping drywall mud has a smooth finish and is used for the final coat of the mudding process to achieve a flawless surface. Its composition is specific to minimize cracking and shrinkage, ensuring a smooth and long-lasting finish.

Choosing the Best Drywall Mud for Your Project
When it comes to selecting the right drywall mud for your project, there are several factors to consider. First, think about the type of project you are working on and the specific application needs. The different types of drywall mud have varying drying times, textures, and adhesive properties that make them suitable for specific purposes.
Let’s take a closer look at the different types of drywall mud available:
| Type | Description |
|---|---|
| All-Purpose | Great for all stages of the mudding process, including taping and finishing. Can be used on a wide range of surfaces. |
| Topping | Used for the final coat of mud to achieve a smooth surface. Typically dries quickly and can be sanded easily. |
| Setting | Has a shorter drying time, making it ideal for large projects or when time is a constraint. Comes in powder form and requires mixing with water before use. |
| Lite Joint | Has a lightweight formulation, making it easier to sand and apply. Suitable for filling larger gaps and cracks. |
| Ready-Mixed | Convenient and easy to use straight out of the container. Great for small projects or when only a small amount of mud is needed. |
It’s important to note that each type of drywall mud has different drying times and consistency, which can affect the overall quality of your finished project. Make sure to read and follow the manufacturer’s instructions carefully and be mindful of the appropriate drying times.
By understanding the different types of drywall mud available and their specific characteristics, you can choose the right type of drywall mud for your project and achieve professional-looking results.

Understanding Drywall Mud Composition
Before using drywall mud, it’s important to understand its composition. Drywall mud is made up of various ingredients that work together to create a compound that can be applied to drywall to create a smooth surface.
The main ingredient in drywall mud is typically calcium carbonate, which is a mineral found in rocks and geological formations. Other common ingredients include talc, quartz, and various polymers and additives that help the mud adhere to surfaces and dry evenly.
Despite common belief, drywall mud is not made entirely of gypsum. While gypsum is sometimes used as an ingredient in certain types of drywall mud, it’s not the main component and is not used in all types of drywall mud.
It’s important to note that drywall mud can also contain some chemicals that may pose health risks if proper safety precautions are not taken. These chemicals can include silica, which is a naturally occurring mineral found in many types of rocks and soils and can be harmful if inhaled or ingested in large quantities.
When working with drywall mud, it’s important to wear personal protective equipment (PPE) such as gloves, goggles, and a dust mask to minimize exposure to any potentially harmful chemicals.

The Difference Between Drywall Compound and Mud
It’s common to hear the terms “drywall compound” and “drywall mud” used interchangeably, but they are not the same thing. Both are used to fill and smooth joints, but they have different properties and purposes.
A drywall compound is a lightweight, pre-mixed substance that contains an adhesive and a filler. It is used to fill small holes and cracks in drywall and for the skim-coating of entire walls or ceilings. It is easy to apply and sand, making it ideal for finishing drywall surfaces.
Drywall mud, on the other hand, is a more heavy-duty substance that is typically used as the primary filler for larger joints and gaps between drywall sheets. It is thicker and heavier than drywall compound and is designed to be used in several coats for a seamless finish. Drywall mud can be purchased in different variations, such as all-purpose, topping, and quick-setting, depending on the specific requirements of the project.
It’s important to choose the right product for your project to ensure a quality finish. While drywall compound may seem like an easier option for filling large gaps, it is not designed for that purpose and may not hold up over time. Conversely, using drywall mud for small holes or repairs can result in a buildup that is difficult to sand down.
Remember to always use the appropriate product for each task and follow manufacturer instructions for the best results.

Can You Use Drywall Mud on Plaster?
One common question that often arises is whether it’s possible to use drywall mud on plaster surfaces. The answer is yes, you can use drywall mud on plaster, but it’s important to consider a few things before doing so.
Firstly, it’s crucial to ensure the plaster is clean and free from any debris or loose particles that could affect the adhesion of the drywall mud. Additionally, it’s recommended to apply a coat of primer or sealant to the plaster surface before proceeding with drywall mud application. This will help to create a smooth and even surface for the mud to adhere to.
It’s also important to note that the thickness and consistency of the drywall mud may need to be adjusted when working on plaster surfaces. This is because plaster is typically harder and more rigid than drywall, so thicker and stronger mud may be needed to properly fill any gaps or cracks.
Overall, using drywall mud on plaster surfaces can be a viable option as long as the necessary preparations and adjustments are made. As with any project involving drywall mud, it’s important to take the time to properly plan and prepare for the best possible results.

Safety Considerations with Drywall Mud
Working with drywall mud can pose potential safety hazards if proper precautions are not taken. It’s important to not only achieve flawless results but also to ensure your own safety and the safety of those around you.
Drywall mud contains various chemicals, including silica, talc, and mica, that can be harmful if inhaled. When sanding drywall mud, wear a mask and use proper ventilation to avoid inhaling the dust particles. Additionally, prolonged exposure to these chemicals can cause skin irritation, so wear gloves when working with drywall mud.
When mixing drywall mud, be sure to read the manufacturer’s instructions carefully to ensure safe handling and use. Some drywall mud types may require adding water or other ingredients, so follow the instructions to achieve the proper consistency.
Finally, once you’ve finished your project, dispose of any leftover drywall mud properly. Do not dump it down the drain, as it can cause clogs and damage to your plumbing system. Instead, allow it to dry out and dispose of it in the trash.
 Always prioritize safety when working with drywall mud. By following proper safety precautions and handling techniques, you can achieve your desired results without compromising your health or the health of others.
How Thick Should Drywall Mud Be?
One of the most crucial aspects of mudding drywall is achieving the right thickness when applying the drywall mud. The ideal thickness of drywall mud varies depending on the specific stage of the mudding process.
During the initial coat, the drywall mud should be applied thinly and evenly, with a thickness of about 1/8 inch. This is also known as the “skim coat” and is intended to create a smooth surface for subsequent coats.
The subsequent coats should be progressively thicker, with each coat having a thickness of about 1/4 inch. This allows for better filling of any gaps or joint seams on the drywall surface.
It is important to note that the thickness of the drywall mud should not exceed 1/2 inch. Excessive thickness can result in cracking or shrinking of the mud as it dries, leading to an uneven finish.
A good rule of thumb is to test the thickness of the drywall mud by running a blade or trowel over the surface. If the blade leaves any marks on the surface, the mud is too thick and needs to be thinned with water. If the blade scrapes the drywall instead of smoothly gliding over it, the mud is too thin and needs to be applied more generously.
Remember, achieving the right thickness of drywall mud is crucial for a smooth and professional-looking finish. Take your time and pay close attention to the thickness of the mud at each stage of the mudding process.

Essential Tools for Mudding
Having the right tools is essential for achieving a professional-looking finish when mudding drywall. Here are some of the essential tools you’ll need:
| Tool | Purpose |
|---|---|
| Taping knife | Used for applying joint tape and smoothing out excess drywall mud |
| Putty knife | Used for applying and smoothing drywall mud in tight areas and corners |
| Mud pan | Used for holding and mixing drywall mud |
| Sanding block/sponge | Used for sanding down rough or uneven spots |
| T-square | Used for measuring and cutting drywall sheets |
Other optional tools that can be helpful include a drywall hawk, a drywall saw, and a corner trowel.
Investing in good quality tools can improve the overall efficiency and quality of your mudding project.

Step-by-Step Guide: How to Mud Drywall
Knowing how to mud drywall is crucial for achieving a smooth and professional-looking finish. Follow these 6 simple steps to achieve the best results.
Step 1: Prepare the Surface
Before you start mudding, ensure the drywall is clean, dry, and free from any debris or dust. Check for any bumps, holes, or other imperfections that need to be fixed before applying the mud.
Step 2: Apply the First Coat
Using a drywall knife, apply the first coat of mud to the drywall. Start from the top corner and spread it evenly, leaving a thin layer of mud. Make sure to scrape off any excess mud and smooth out any ridges or bumps.
Step 3: Apply Joint Tape
After the first coat of mud has dried, apply joint tape to cover the seams between the drywall sheets. Press the tape firmly and make sure it lies flat without any bubbles.
Step 4: Apply the Second Coat
Apply a second coat of mud over the joint tape using a drywall knife. Spread the mud evenly and feather out the edges to avoid any visible lines. Let the second coat dry completely.
Step 5: Sand the Surface
Use fine-grit sandpaper to sand the dried mud until it is smooth and even. Make sure not to sand down to the joint tape or the drywall paper.
Step 6: Apply the Final Coat
Apply the final coat of mud with a wider drywall knife, covering a wider area than the previous coats. Feather out the edges and let the mud dry completely. Sand the surface again to achieve a perfectly smooth finish.
Following these steps can help you achieve professional-level results when mudding your drywall. Remember to take your time and use the right tools and techniques to ensure flawless results.

When to Use Drywall Mud
Knowing when to use drywall mud is crucial in achieving a professional-looking finish. Drywall mud is typically used for covering up joints and seams of drywall installations, as well as for repairing dents, holes, and other imperfections on walls.
Drywall mud is also commonly used for creating texture or patterns on walls, as well as for creating smooth surfaces for painting or wallpapering. It is an essential component of any home renovation or remodeling project involving drywall.

When working with drywall, it is important to choose the right type of drywall mud for your desired outcome. This will depend on factors such as the type of drywall, the texture or finish you want to achieve, and the project’s scope.
Exploring the Different Types of Drywall Mud
When it comes to selecting the right drywall mud for your project, there are various types available in the market. Each type of drywall mud has its specific characteristics and applications, making it important to understand the differences between them.
| Type of Drywall Mud | Main Characteristics | Applications |
|---|---|---|
| All-Purpose Joint Compound | Works well in most situations, is versatile, and easy to work with | Best used for filling seams, covering screw holes, and finishing nail heads |
| Topping Compound | Air-dries quickly has a smooth finish and is easy to sand | Commonly applied as the final coat to provide a professional finish |
| Setting-Type Joint Compound | Quick-drying hardens by a chemical process and is more durable than all-purpose | Best used for embedding tape, filling large gaps, or working on thin or tapered edges |
| Lightweight Joint Compound | Easy to sand and has less shrinkage compared to all-purpose | Best used for finishing large surfaces, reducing weight, or building up multiple coats |
| Textured Compound | Contains sand or aggregate for creating texture on walls and ceilings | Best used for patterned finishes, creating a unique look, or hiding surface imperfections |
Choosing the right type of drywall mud for your project can make a significant difference in the outcome of your work. Consider the characteristics and applications of each type carefully before making a selection.

The Importance of Properly Taping and Mudding Drywall
When it comes to achieving a smooth and seamless finish with drywall, proper taping, and mudding techniques are essential. Not only do these techniques help to hide joints and seams, but they also provide a solid foundation for paint or wallpaper.
The key to effective taping and mudding is, to begin with a clean and properly prepared surface. This means removing any debris, dust, or loose material from the drywall surface and applying a coat of primer.
Once the surface is ready, the next step is to apply joint tape over the seams. This tape helps to reinforce the joint and hold the mud in place. When taping, be sure to use a wide enough tape that covers the seam completely and extends slightly onto the surrounding drywall.
After the tape is in place, it’s time to apply the mud. Begin by spreading a thin layer of mud over the tape, making sure to smooth out any wrinkles or bubbles in the tape. Then, apply a second, wider layer of mud over the first layer, feathering the edges out to create a smooth transition onto the surrounding drywall.
Repeat this process, applying additional layers of mud as needed until the joint is completely covered and smooth. Be sure to allow each layer of mud to dry thoroughly before applying the next.
One common mistake to avoid when taping and mudding is over-sanding. It’s important to sand only enough to remove any rough spots or bumps and create a smooth surface, without sanding through the mud layers and exposing the tape.

In summary, properly taping and mudding drywall is crucial for achieving a professional-looking finish. By taking the time to prepare the surface, selecting the right tape and mud, and using the proper techniques, you can ensure flawless results every time.
Common Mistakes to Avoid When Mudding Drywall
While mudding drywall may seem like a straightforward task, there are some common mistakes that can lead to disappointing results. By avoiding these mistakes, you can ensure that your finished drywall looks smooth and professional.
Avoiding the following mistakes can help you achieve the best results:
- Not Cleaning the Surface: Before applying drywall mud, make sure the surface is free from dust, debris, and any loose drywall paper. Failing to clean the surface properly can result in uneven mudding and a rough finish. Use a vacuum or damp cloth to remove any debris.
- Over-sanding: Sanding drywall mud is necessary to achieve a smooth finish, but over-sanding can result in damage to the drywall. Apply only light pressure when sanding and avoid using coarse sandpaper.
- Inconsistent Mud Thickness: It is important to maintain consistent thickness when applying drywall mud. Uneven application can lead to lumps and bumps that are difficult to smooth out. Use a measuring tool to ensure you have a consistent thickness throughout.
- Skipping the Taping Step: Taping ensures that your mudding remains strong and doesn’t crack over time. Skipping the taping step can lead to unsightly cracks and damage to the drywall.
- Not Mixing the Mud Well: Make sure to mix the drywall mud thoroughly before applying it. Failing to do so can result in lumps and air bubbles, making it difficult to achieve a smooth finish.
- Applying Too Much Mud: Applying too much mud at once can result in excess weight on the drywall, leading to sagging or cracking. Apply thin, even coats and allow each layer to dry completely before applying the next.
By avoiding these common mistakes, you can achieve professional-looking results when mudding drywall.

Remember, proper preparation, technique, and attention to detail are key to achieving optimal results when mudding drywall
Conclusion
Mastering drywall mud is a crucial component of achieving a professional-looking finish when working with drywall. With the right techniques and knowledge, you can achieve impeccable results that will make your project stand out. Remember to choose the right type of drywall mud for your project and to work with the appropriate thickness, using essential tools for mudding.
Ensure your safety by taking precautions when handling drywall mud. Always follow the manufacturer’s instructions and be aware of potential hazards. Additionally, proper taping and mudding are essential for achieving a seamless finish. Be sure to avoid common mistakes, and follow our step-by-step guide for getting the job done right.
We hope this article has provided you with valuable insights, tips, and techniques to help you master the art of drywall mud. With this knowledge, you’ll be able to tackle your next project with confidence, achieving flawless results that will leave you and your clients impressed.
Thanks For the Great Attention!
Good Bye & Take Care
Happy Learning
Also, Read,
1000sqft House Plinth Beam Cost
POP Vs Gypsum Vs PVC Vs Grid False Ceiling – An Ultimate Comparision
Wall Mounted vs Floor Mounted Toilets
FAQ
Q: What is drywall mud?
A: Drywall mud, also known as joint compound or plaster, is a paste-like substance used to fill gaps, seams, and joints in drywall installations. It is applied to create a smooth and seamless surface before painting or finishing.
Q: How do I choose the best drywall mud for my project?
A: When choosing drywall mud, consider factors such as the type of drywall you are working with, the desired finish, and the application method. Common types of drywall mud include lightweight, all-purpose, and setting compounds. Consult the manufacturer’s recommendations for specific guidance.
Q: What is drywall mud made of? Is it gypsum?
A: Drywall mud is typically made of a mixture of gypsum powder, water, and other additives. It is not entirely made of gypsum but does contain gypsum as one of the main ingredients. These additives help improve the consistency, drying time, and overall performance of the mud.
Q: What is the difference between drywall compound and mud?
A: Drywall compound and mud are often used interchangeably, but there is a slight distinction. Drywall mud is generally used for filling and finishing seams and joints, while drywall compound refers to a broader range of products used for various drywall-related tasks, including patching and texturing.
Q: Can I use drywall mud on plaster surfaces?
A: Drywall mud is not recommended for use on plaster surfaces. Plaster is a different material that requires specific techniques and products for repairs and finishing. Consult a professional or expert for guidance on working with plaster surfaces.
Q: Is drywall mud safe to use? What chemicals are in it?
A: Drywall mud is generally safe to use when handled properly. However, it may contain substances such as limestone, talc, and other additives. It is important to read and follow the manufacturer’s safety instructions, wear protective gear, and work in a well-ventilated area when working with drywall mud.
Q: How thick should drywall mud be?
A: The thickness of drywall mud depends on the specific stage of the mudding process. For the initial coats, the mud should be thin enough to apply smoothly but thick enough to fill gaps and seams. The final coats should be thinner to achieve a smooth and even finish. Consistency can be adjusted by adding water or thinning compounds.
Q: What are the essential tools for mudding?
A: Essential tools for mudding drywall include a taping knife, a mud pan, a hawk, a sanding block or sandpaper, and a drywall trowel. These tools are used for applying and smoothing the mud, as well as for sanding and finishing the surface.
Q: How do I mud drywall? Can you provide a step-by-step guide?
A: Mudding drywall involves several steps for achieving a professional-looking finish. Here is a simplified step-by-step guide: 1. Prepare the surface by cleaning and priming the drywall. 2. Apply the first coat of mud using a taping knife. 3. Embed drywall tape over the seams and press it firmly into the mud. 4. Apply additional coats of mud, feathering the edges with each coat. 5. Let the mud dry completely and sand the surface. 6. Repeat the process with subsequent coats until the desired finish is achieved.
Q: When should I use drywall mud?
A: Drywall mud is used in various situations, including new drywall installations, repairs, renovations, and finishing projects. It is necessary for filling gaps, covering seams, and achieving a smooth surface before painting or applying texture.
Q: What are the different types of drywall mud?
A: There are several types of drywall mud available, including lightweight, all-purpose, topping, and setting compounds. Each type has specific characteristics and applications. Lightweight mud is easier to handle and sand while setting compound dries quickly. All-purpose mud is versatile and commonly used for general mudding tasks.
Q: Why is properly taping and mudding drywall important?
A: Properly taping and mudding drywall ensures a seamless finish and helps prevent cracks and visible seams. It creates a smooth surface for painting or applying texture, enhancing the overall appearance and durability of the installation.
Q: What are common mistakes to avoid when mudding drywall?
A: Common mistakes when mudding drywall includes applying too much or too little mud, failing to properly feather the edges, not allowing the mud to dry between coats, and neglecting to sand the surface adequately. These mistakes can result in an uneven or rough finish. Take your time, follow the proper techniques, and practice to achieve the best results.

Magnificent items from you, man. I have consider your stuff previous to and you’re simply extremely great.
I actually like what you’ve acquired here, certainly like what you
are stating and the way in which during which you are saying it.
You make it enjoyable and you continue to
take care of to keep it smart. I cant wait to learn far more from you.
That is actually a wonderful web site.
excellent points altogether, you simply won a emblem new reader.
What may you suggest in regards to your submit that you made some days in the past?
Any sure?