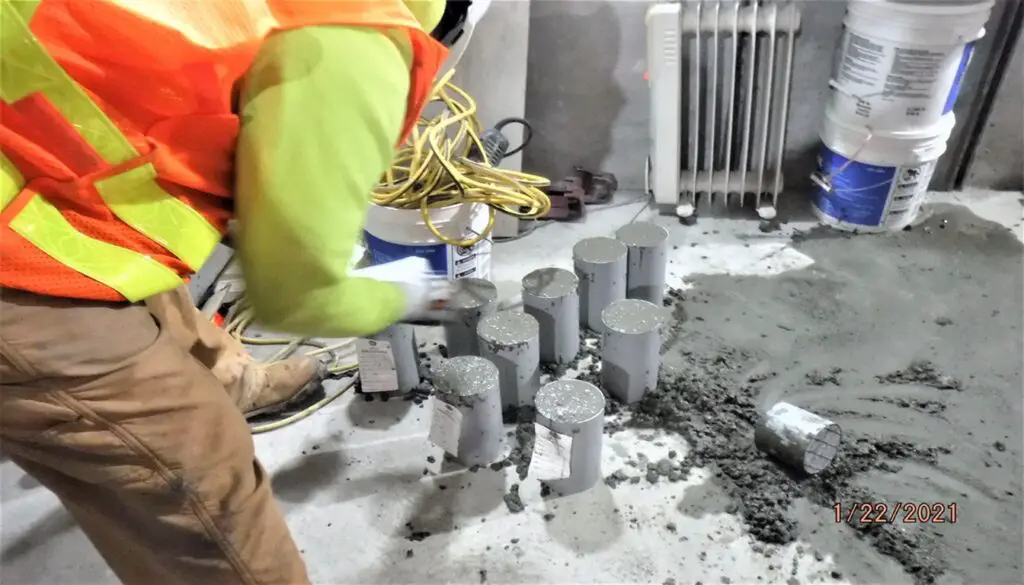
As professionals in the construction industry, we understand the importance of reliable and high-quality concrete. The slump test is a widely used method for assessing the workability and consistency of freshly mixed concrete. In this article, we will cover the types of concrete slumps, the IS code standards, precautions to be taken, and a procedure step-by-step for performing the test. By following these guidelines, we can ensure that we use concrete of consistent quality in our projects.
Key Takeaways:
- The slump test determines the degree of deformation or “slump” of freshly mixed concrete.
- The Indian Standard (IS 1199:1959) outlines the guidelines for conducting the test.
- Precautions should be taken during the testing process to obtain accurate results.
- The procedure involves a specific apparatus and a step-by-step process to accurately measure the slump.
- The slump test plays a crucial role in ensuring the quality and performance of concrete in construction projects.
What is a Slump Test of Concrete?
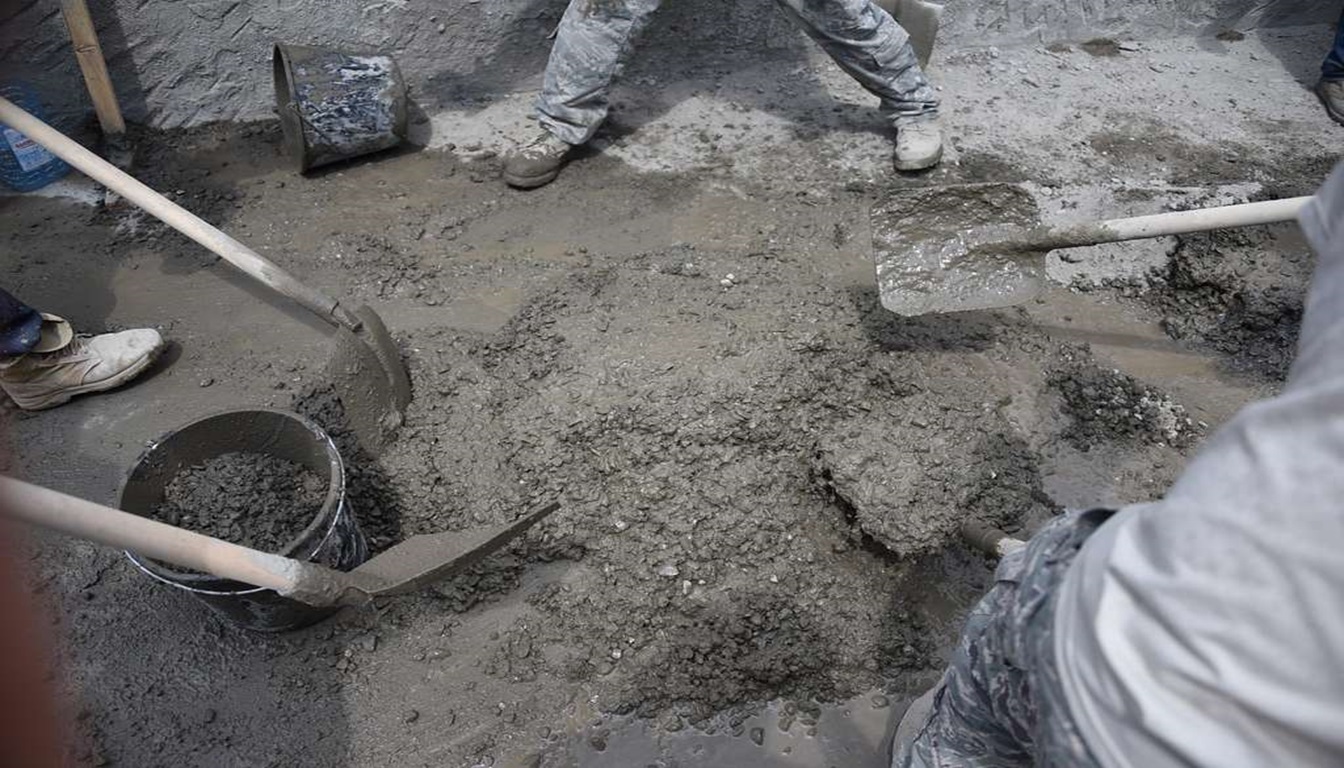
The construction industry relies on concrete to build durable and strong structures. However, improperly mixed concrete can lead to weak and brittle constructions resulting in financial loss due to repairs or reconstruction. This is why the slump test of concrete is a crucial process to gauge the workability and consistency of fresh concrete.
The slump test of concrete determines the degree of deformation, or “slump,” of the concrete when a cone-shaped mold is removed. This measurement technique is commonly used to assess the concrete mix’s properties, including its strength, stability, and water-to-cement ratio. By using a standard procedure to measure the slump, we can mitigate the risk of poor-quality concrete.

Types of Concrete Slump
Assessing the workability and consistency of freshly mixed concrete requires understanding and categorizing the different types of slumps based on their shape and consistency. Let’s take a closer look at the types of concrete slumps:
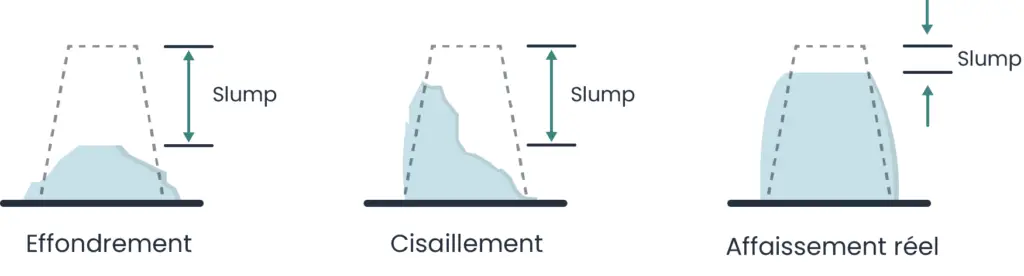
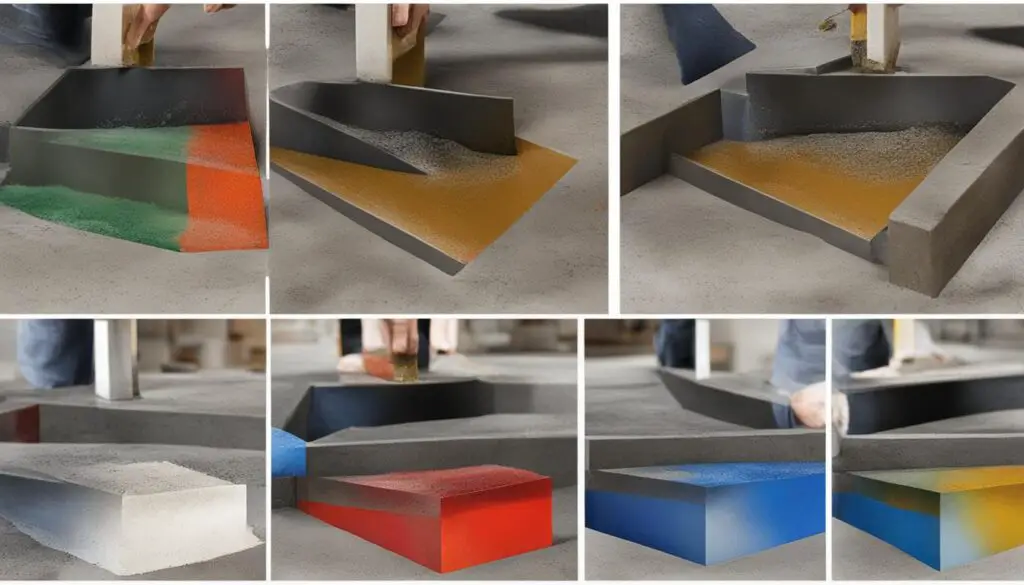
True Slump
Measuring a true slump is ideal for concrete mixtures with a low water-cement ratio. It occurs when the concrete mixture spreads out laterally but does not segregate. A true slump indicates that the concrete is workable and consistent. The diagram below shows what a true slump looks like:

Shear Slump
In a shear slump, the concrete mixture cracks at an angle of approximately 45 degrees. This type of slump usually occurs when the mix has a high water-cement ratio. A shear slump indicates that there is excess water in the mixture, resulting in weaker concrete. The diagram below shows what a shear slump looks like:
| Characteristics of Shear Slump | |
|---|---|
| The angle of a slump is 45 degrees | (Figure A) |
| Cracks appear on the surface between the slump’s two portions | (Figure B) |
| The top portion of the slump is sheared off and slipped sideways | (Figure C) |
Collapse Slump
The collapse slump is also known as a true collapse or a disintegrated slump. This type of slump occurs in a concrete mix with an excess of water or higher air content. It results in the complete collapse of the concrete that spreads out over a massive area. The diagram below shows what a collapse slump looks like:
| Characteristics of Collapse Slump | |
|---|---|
| Concrete collapses and spreads out onto a massive area | (Figure A) |
| The mixture is excessively wet and contains too much water or air | (Figure B) |
| The concrete completely loses its shape and cohesiveness | (Figure C) |
Understanding the different types of concrete slumps is critical in determining the workability of the mix. Remember, to obtain reliable results, it is essential to adhere to the designated IS code for conducting the slump test of concrete and conducting the test accurately.
IS Code for Slump Test of Concrete
The Indian Standard (IS 1199:1959) provides guidelines and specifications for performing a slump test of concrete. Adhering to the IS code is essential to ensure accurate and reliable results. By following the code, the slump test can be executed with precision, providing valuable information about the concrete’s workability and consistency.
The IS code specifies the dimensions of the slump cone, the method of filling the cone, the number of tamping blows required, and the standard parameters for measuring the slump. It also highlights the precautions that should be taken while carrying out the test, such as ensuring the cone is clean and preventing leakage of the concrete from the base plate.
Adhering to the IS code is especially crucial in construction projects, as it serves as a benchmark for quality control and consistency. Following the guidelines outlined in the code ensures that each tested concrete sample is evaluated on an equal footing, providing a uniform basis for construction applications.

“Adhering to the IS code for slump testing of concrete is an essential requirement for conducting accurate and reliable tests, ensuring high-quality concrete in construction projects.”
Precautions for the Slump Test
Performing a slump test requires several precautions to ensure accurate and reliable results. We recommend taking the following precautions:
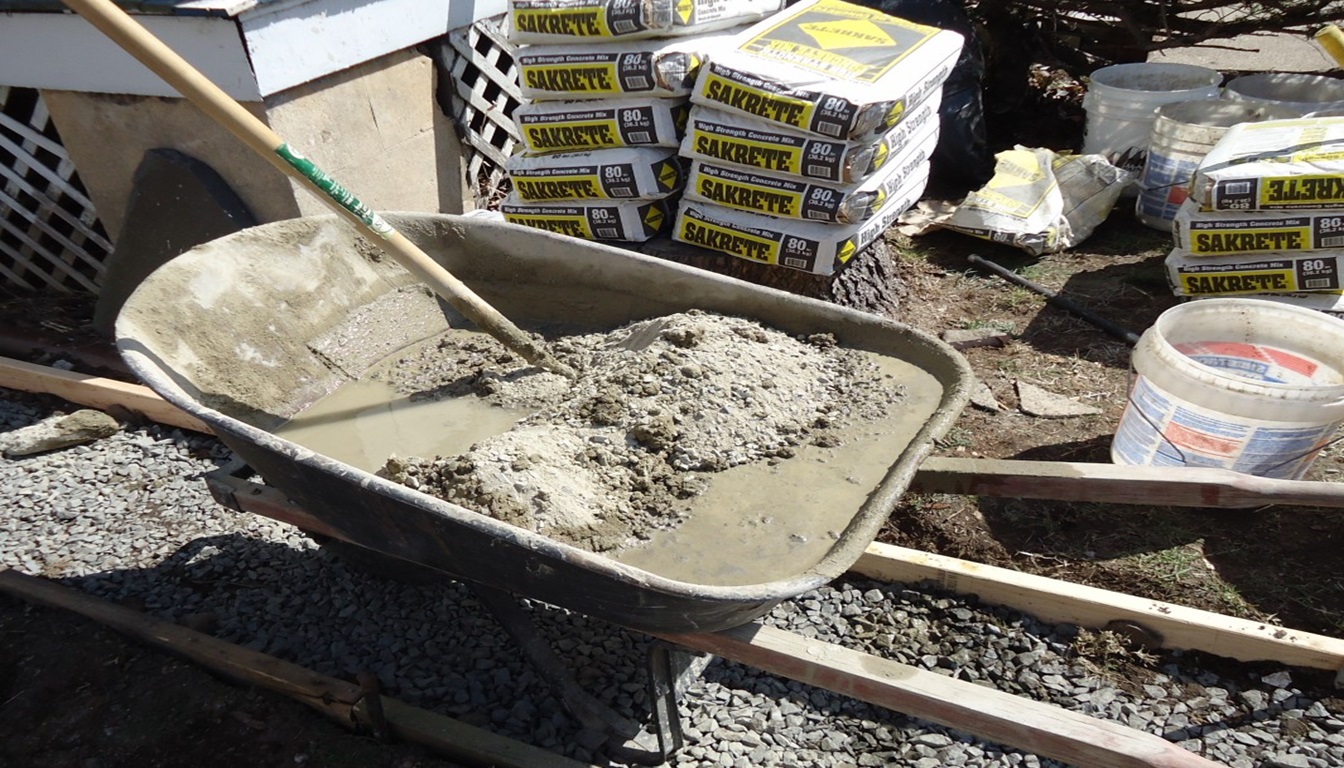
- Use fresh concrete: Only use freshly mixed concrete for the test as hardened concrete can give inaccurate results.
- Prepare the apparatus correctly: Ensure the slump cone and tamping rod are clean and free of debris. The slump cone should be level and placed on a smooth, flat surface.
- Avoid overmixing: Overmixing of concrete can cause a decrease in the slump value. Follow the manufacturer’s guidelines for mixing times and avoid adding additional water.
- Keep the temperature of the equipment and concrete uniform: Fluctuations in temperature can affect the slump test results. Keep the equipment and concrete sample at the same temperature before conducting the test.
- Perform the test on time: Do not wait too long to perform the test after mixing the concrete, as it can begin to set and affect the slump value.
- Avoid tapping the slump cone too hard: Tapping the cone too hard with the tamping rod can cause the concrete to segregate or compact, leading to incorrect results.

By taking these precautions, accurate and reliable results can be obtained during the slump test, ensuring the quality and performance of the concrete in construction projects.
Apparatus Required for the Slump Test
To conduct a slump test, we need to have a specific apparatus. The essential apparatus required are:
| Apparatus | Purpose |
|---|---|
| Slump Cone | The slump cone is a mold in the shape of a frustum of a cone that is open at both ends. It is used to measure the workability of concrete, which is equal to the degree of deformation of the concrete. |
| Tamping Rod | The tamping rod is made of steel and is bullet-pointed at one end and equipped with a handle at the other. Its purpose is to compact and smooth the surface of the concrete while at the same time removing any voids within the mold. |
| Measuring Scale | The measuring scale is used to determine the slump of concrete horizontally. It has to be graduated in increments of 5 mm and 10 mm. |
We have to ensure that the slump cone, tamping rod, and measuring scale are clean and free from any debris or rust before we begin the slump test. Additionally, we need water and a non-absorbent surface to place the slump cone on.
Step-by-Step Procedure for the Slump Test
At this stage, we will explain the step-by-step process of conducting a slump test of concrete. It is essential to follow these steps in the correct order for accurate and reliable results.
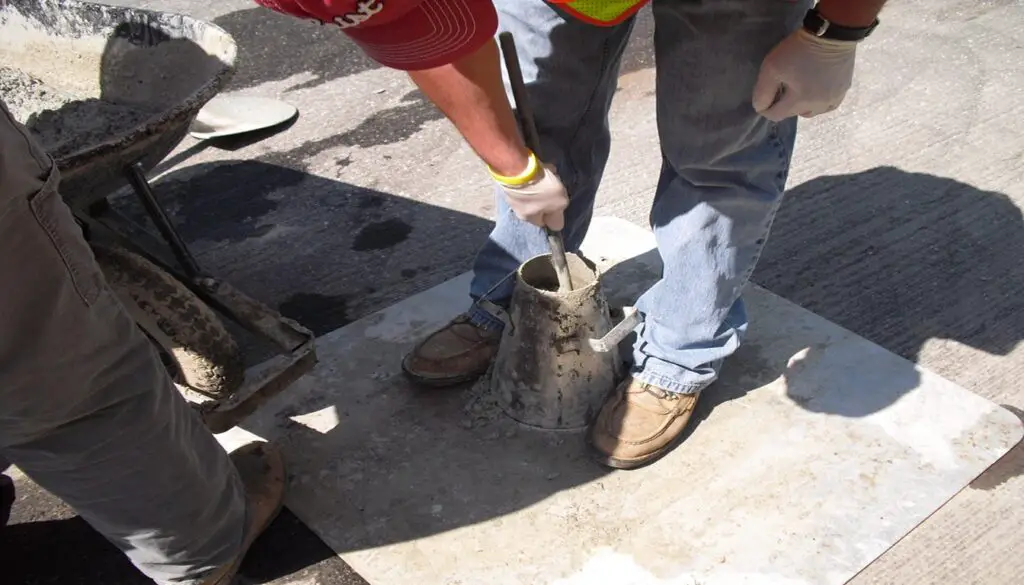
- Prepare the slump cone: Clean the slump cone thoroughly and lightly oil the inside to prevent the concrete from sticking.
- Fill the cone: Place the slump cone on a flat surface. Fill the cone with freshly mixed concrete in three equal layers, tamping each layer 25 times with a standard tamping rod.
- For better results, the concrete should be placed in the cone using a scoop or a funnel.
- Avoid overloading the cone with concrete; it should only be filled up to two-thirds of its height.
- Level the top: Level the top of the concrete with a trowel or straight edge, making sure it is even with the top edge of the cone.
- Remove the slump cone: Carefully lift the cone directly upward from the concrete, making sure it doesn’t twist or rotate.
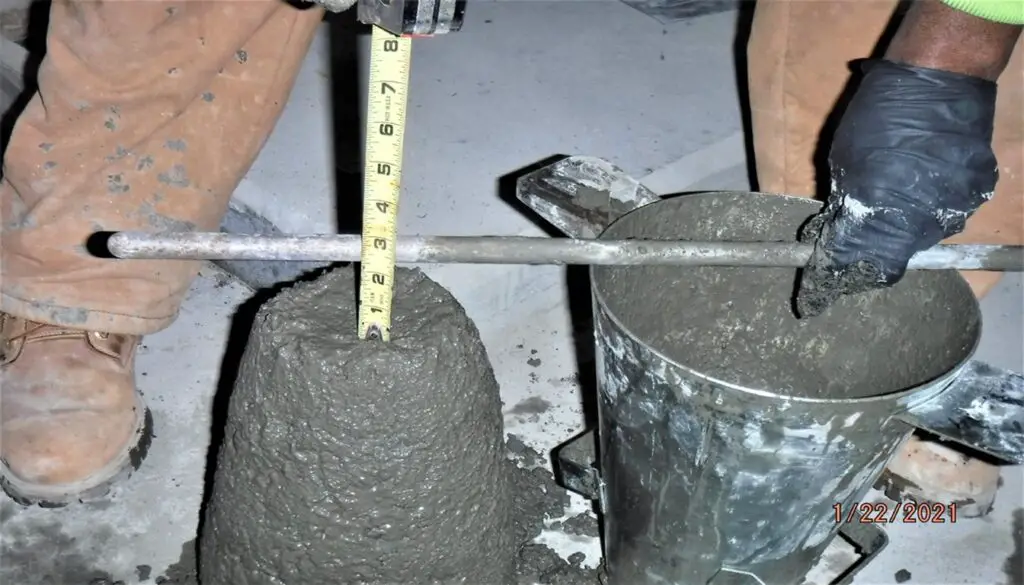
- Measure the slump: Measure the distance between the height of the original concrete and the new height of the concrete after the slump cone has been removed.
- Measure using a standard ruler or a measuring tape, making sure it touches the top of the concrete.
- Record the measurement in millimeters as the slump of the concrete.
- Clean the apparatus: Clean the slump cone and tamping rod thoroughly after each test.
Following these steps will help you obtain accurate and reliable results from the slump test of concrete. The next section will focus on interpreting the results obtained from the slump test.
Interpreting the Results of the Slump Test
After conducting the slump test, it is crucial to interpret the results accurately. The concrete slump measurement determines the consistency and workability of the freshly mixed concrete.
The slump measurement is obtained by measuring the difference in height between the top of the cone and the height of the slumped specimen. The result is expressed in millimeters (mm), indicating the degree of deformation or slump of the concrete.
To determine concrete slump, we look at the measurements obtained:
- If the slump height is less than 25mm, the concrete has a low slump and is considered stiff and dry.
- If the slump height ranges from 25 to 50mm, the concrete has a moderate slump and is considered workable for most applications.
- If the slump height is greater than 50mm, the concrete has a high slump and is considered overly wet and less workable.
The ideal slump measurement depends on the specific construction phase, such as pouring into the formwork, pumping, or spraying. It is important to note that interpreting the test results requires experience and knowledge about concrete mix designs and construction requirements.
It is equally important to be aware of factors that can affect slump test results and make adjustments if necessary. In the next section, we will discuss the various factors influencing the slump of concrete.
Factors Affecting the Slump of Concrete
Several factors can impact the slump of concrete. It’s essential to keep these factors in mind when conducting a slump test to achieve accurate and reliable results. The factors influencing the slump of concrete include:
- Water Content: The amount of water in the concrete mix can significantly affect the slump. If the mix contains too much water, the slump will be higher, resulting in reduced strength and durability.
- Aggregate Properties: The size, shape, and texture of the aggregate particles can also impact the slump. Larger aggregate particles require more water to achieve the same workability as smaller particles.
- Admixtures: The addition of admixtures, such as plasticizers or superplasticizers, can alter the slump of the concrete mix. For example, including a water-reducing admixture can improve workability while reducing the water content.
| Factors | Impact on Slump |
|---|---|
| Increased water content | Higher slump |
| Larger aggregate size | Lower slump |
| Angular aggregates | Lower slump |
| Round aggregates | Higher slump |
| Inclusion of plasticizers | Higher slump |
| Inclusion of superplasticizers | Lower slump |
Significance of Slump Test in Construction
The slump test is an essential part of constructing any concrete structure, as it helps in determining the workability and consistency of freshly mixed concrete. The test helps to ensure the concrete’s quality and performance, which is critical in achieving desired properties such as strength, durability, and water-tightness.
The slump test provides useful insights into the concrete mix design and helps in identifying any issues that may arise from changing the mix proportions. The test results can help in optimizing the mix design by adjusting the amount of cement, aggregates, and water to achieve the desired properties efficiently.
Furthermore, the slump test results help in determining the amount of time the concrete will take to set, which is crucial in planning construction schedules. Accurate slump results also reduce the risk of issues such as segregation, bleeding, and honeycombing, which can lead to structural defects and reduce construction quality and durability.
The Use of Slump Measurements in Building Codes and Standards
The significance of the slump test is also reflected in building codes and standards, which often require it as part of the quality control process. For instance, the Indian Standard (IS 456:2000) recommends minimum and maximum slump values based on the type of construction project. Other codes and standards also provide guidelines on how to perform the test and interpret its results.
Therefore, it is crucial to conduct slump tests for construction projects to meet the necessary building codes and standards, ensuring safety and quality. By following the designated IS code, taking necessary precautions, and conducting tests accurately, reliable results can be obtained. Overall, the slump test is a valuable tool in the construction industry, helping to ensure high-quality concrete structures that conform to building standards.
Common Errors and Troubleshooting in Slump Testing
Although performing a slump test can provide valuable information regarding the workability of fresh concrete, errors can arise during the testing process due to various reasons. Here, we’ve compiled a list of common errors and troubleshooting tips:
- Incorrect Slump Cone Placement: Placing the slump cone on an uneven surface can result in inaccurate readings. Make sure to place the cone on a leveled, stable surface.
- Compaction Errors: Using an improper method of compaction can lead to inaccurate results. Ensure that the concrete is compacted uniformly using the tamping rod by filling the mold with 3 layers of concrete, each being tamped 25 times.
- Excessive Water: Adding too much water to the concrete mix will result in a higher slump measurement, regardless of the concrete’s actual workability. Ensure that the water is accurately measured, and the mix is not overwatered.
- Cone Overfilled: Filling the cone above the brim will lead to irregular slump readings. Carefully fill the cone with concrete without overflowing it.
- Initial Set: Waiting too long to take the measurement can lead to low slump values. Measure within the time frame specified in the IS code.
Troubleshooting Tips :
If you encounter any of the above errors during the slump test, here are some troubleshooting tips:
- Repeating the test: In case of any error, it is recommended to repeat the slump test to ensure accurate results.
- Adjusting Compaction Method: Changing the compaction method to the rodding method/offering a choke to the tamping rod can be done to correct the compaction errors.
- Taking Proper Precautions: Taking the necessary precautions, such as properly calibrating and lubricating the mold, ensuring correct temperature and humidity, and properly handling and batching the materials, can avoid many errors in the slump test.
Comparing Slump Test with Other Workability Tests
While the slump test is a popular method for assessing the workability of concrete, there are other tests available that can also provide valuable insights. In this section, we will compare the slump test with two other common workability tests: the flow test and the compacting factor test.
Flow Test
The flow test, also known as the V-funnel test, measures the flowability of concrete by determining the time it takes for the concrete to flow through a specially designed funnel. The flow test is often used for self-compacting concrete and can be a useful alternative to the slump test in situations where traditional slump testing may not be practical.
One potential advantage of the flow test is that it can be performed quickly and easily, requiring only the funnel apparatus and a measuring graduate. However, the results of the flow test may be less accurate than the slump test in certain situations, particularly if the concrete has a high viscosity or contains a large amount of aggregate.
Compacting Factor Test
The compacting factor test measures the workability of concrete by determining the amount of compaction that can be achieved with a standard amount of energy input. During the test, a sample of concrete is placed in a cylindrical container and compacted using a standard amount of vibration, after which the compacting factor is calculated based on the volume of the compacted concrete.
The compacting factor test is generally more suited to dry or semi-dry concrete mixes and may not be as effective for concrete mixes with higher water content. Additionally, the test requires specialized equipment, such as a vibrating table and measuring equipment, which may not be readily available on job sites.
Overall, each workability test has its advantages and limitations, and the choice of tests will depend on the specific project requirements and materials being used. However, the slump test remains a widely accepted and reliable method for assessing the workability of concrete and is typically the default option for most construction projects.
Limitations of the Slump Test
Despite its usefulness, the slump test has certain limitations that should be considered. The following are the most significant limitations of the method:
- Inability to evaluate internal consistency: The slump test only measures the surface behavior of concrete, and it cannot determine the internal consistency of the mixture. Therefore, the test does not provide complete information on the properties of the concrete.
- Effect of aggregate size on the test results: The slump test is not effective for concrete having aggregates larger than 50 mm. Larger aggregates tend to settle more quickly during the testing process, resulting in a lower slump value.
It’s essential to keep these limitations in mind while interpreting the slump test results and making decisions based on them. In situations where internal consistency or larger aggregates are a concern, other testing methods may be more effective.
Safety Precautions for Conducting the Slump Test
When conducting the slump test, safety must be a top priority to prevent any accidents or injuries. Here are some important safety precautions to keep in mind:
- Personal Protective Equipment (PPE): To safeguard yourself from any harmful chemicals or materials, always wear the appropriate PPE, including gloves, goggles, and a mask.
- Handling the Apparatus: The apparatus used in the slump test should always be handled with care to avoid any damage or breakage. Avoid any rough handling or throwing of the apparatus.
- Mixing the Concrete: While preparing the concrete sample, avoid direct contact with the mix and use suitable PPE. Ensure that the mix is properly disposed of and kept away from children and animals.
- Slump Cone: Be extremely careful while inserting and removing the slump cone from the concrete, as there is a risk of it getting stuck. Use the provided tamping rod and gently tap the edges to prevent any blockages.
- Mold Removal: Take great care while removing the mold to ensure the concrete does not fall and cause injuries. Keep a safe distance and use protective gloves during mold removal.
- Cleaning: After the completion of the slump test, clean the apparatus and dispose of any remaining materials safely and appropriately.
By following these safety precautions, we can ensure a safe and secure slump testing process for everyone involved in the testing procedure.
Conclusion
In summary, we have discussed the various aspects of the slump test of concrete in detail. We learned that the slump test is a crucial procedure for determining the workability and consistency of fresh concrete and is widely used in construction projects. By following the guidelines of the designated IS code, taking necessary precautions, and conducting the test accurately, reliable results can be obtained.
It’s essential to interpret the results correctly and understand the impact of various factors on the slump of concrete. We also discussed common errors and troubleshooting tips, safety precautions, and limitations of the test. Comparisons with other workability tests were also made.
Overall, we hope that this article has provided a comprehensive understanding of the slump test of concrete and its significance in construction. By implementing the best practices and techniques discussed, high-quality concrete can be achieved, ensuring the success of construction projects.
Thanks For the Great Attention!
Good Bye & Take Care
Happy Learning
Also, Read,
FAQ
What is a Slump Test of Concrete?
The slump test is a commonly used measurement technique to assess the workability and consistency of freshly mixed concrete. It determines the degree of deformation or “slump” of the concrete when a cone-shaped mold is removed.
What are the types of Concrete Slump?
Concrete slumps can be categorized into different types based on their shape and consistency. The types of slumps include true slump, shear slump, and collapse slump.
What is the IS Code for the Slump Test of Concrete?
The Indian Standard (IS 1199:1959) provides guidelines for conducting the slump test of concrete. It outlines the specific requirements and procedures for the test.
What precautions should be taken for the Slump Test?
Performing a slump test requires certain precautions to ensure accurate and reliable results. Some important precautions include ensuring proper curing of the concrete, selecting the appropriate slump range, and conducting the test in a controlled environment.
What apparatus is required for the Slump Test?
To conduct a slump test, a specific apparatus is needed. This includes a slump cone, tamping rod, and measuring scale. Each of these apparatus serves a specific purpose in the test process.
What is the step-by-step procedure for the Slump Test?
The step-by-step procedure for performing a slump test includes preparing the concrete sample, filling the slump cone, compacting the concrete, removing the slump cone, and measuring the slump deformation.
How do you interpret the results of the Slump Test?
Once the slump measurement is obtained, it’s essential to interpret the results correctly. The concrete slump measurement signifies the workability and consistency of the concrete, with different measurements indicating different levels of workability.
What factors can affect the Slump of Concrete?
Several factors can influence the slump of concrete, including water content, aggregate properties, admixtures, and temperature. It’s important to consider these factors when performing the slump test and interpreting the results.
What is the significance of the Slump Test in construction?
The slump test plays a crucial role in ensuring the quality and performance of concrete in construction projects. It helps in achieving the desired concrete properties, confirming proper workability, and ensuring consistency in the concrete mix.
What are common errors and troubleshooting tips in Slump Testing?
Despite following the correct procedure, errors can occur during the slump test. Common errors include improper compaction, incorrect measurement, and inaccurate slump cone positioning. Troubleshooting tips to overcome these challenges involve retesting, adjusting the concrete mix, and practicing proper technique.
How does the Slump Test compare to other workability tests?
While the slump test is widely used, there are other tests available to assess the workability of concrete, such as the flow test and compacting factor test. Each test has its advantages and limitations, and the choice of test depends on specific project requirements and objectives.
What are the limitations of the Slump Test?
Despite its usefulness, the slump test has certain limitations. It cannot evaluate the internal consistency of the concrete or assess properties related to strength or durability. Additionally, the size and shape of the aggregates used can affect the test results.
What safety precautions should be taken when conducting the Slump Test?
Safety should always be a priority when conducting the slump test. Precautions include wearing appropriate personal protective equipment (PPE), maintaining a clean and organized work area, and avoiding contact with fresh concrete or moving parts of the apparatus.
Slump test of concrete live video